A Dust Free Wood Floor Sanding Service
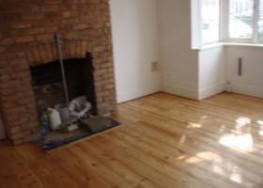 Wooden floors are a wonderful addition to any home. They’re practical, clean, functional, and naturally beautiful. All timbered floors, however, require a certain amount of maintenance to keep them in top condition and looking their best. Depending on their age and wear, that could mean a fresh coat of oil or lacquer or a completely new finish.
Most tired or damaged wood floors don’t need to be replaced. Rather, they simply need a little love and attention from our restoration specialists. Certified by leading equipment manufacturers, we can bring new life to floors that are groaning under layers of grime and old varnish. With over 15 years of experience, we guarantee high quality and superior results.
Wood floor sanding is usually the first step in the restoration process. Sanding prepares the surface for finishing by removing the protective layer of varnish, lacquer or oil. The original finishing may have been applied a great many years ago. Our goal is to create a perfectly smooth and clean floor that’s ready for a new finishing layer.
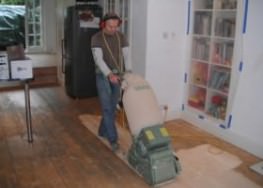
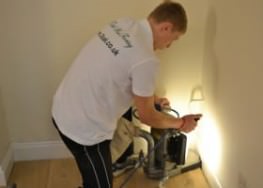
At 3 Oak Wood Flooring, we use modern sanding machines that come equipped with dust capturing bags. As a result, we can prevent up to 96% of the sawdust produced from being released into the air. Along with the latest equipment, we only work with dedicated experts who have extensive experience in refinishing all types of wood floors.
Dust Free Wood Floor Sanding Service
Most modern sanding machines come equipped with dust capturing bags. We use them to prevent almost all dust and particles from being released into the air during the sanding and finishing process. A small amount of dust, however, may be created when we are buffing the floors. That’s because the floor sanders don’t always reach into tight corners. We need to use different tools or hand-sanding to complete the work.
Wood Floor Sanding Machines
 There are basically two different types of wood floor sanding machines.
Drum sanders mount the sandpaper on a cylindrical drum which rotates parallel to the floor. As the drum moves across the floor, the sandpaper scratches off the old finish in a straight line. Alternatively, disk sanders rotate the sandpaper in a circular motion. This creates scratching across the grain of the wood.
Along baseboards and in corners, small disk sanders are used to access points beyond the reach of a drum sander and may be finished by hand.
Sandpaper
 Sandpaper removes the old finish by scratching off a tiny layer of the wooden floor’s surface. The size of the scratches is determined by the grit of the sandpaper. A coarse grit removes the layers of ancient varnish and oil quickly but leaves deeper and more conspicuous marks. Finer grits take longer to work, but the scratches they leave behind are much less visible.
The imprint of the sandpaper is greatly reduced by scratching along the grain of the wood rather than across it. A finer grain must also be used with wood like maple that has a close texture. When we begin a refurbishment project, we start with a coarse grain of sandpaper. This removes most of the old finish and smooths out any imperfections. Once the floor is level, we use increasingly finer grits to get rid of all marks and scratches. The sanding is completely invisible once a finishing coat has been applied.
Wood Floor Sanding Procedures
 All wood floor sanding projects begin with a thorough sweep of the floor to remove loose dirt, debris and dust. Any protruding nails in either the floor or baseboards are then set or countersunk to prevent damage.
New hardwood floors usually only need two sanding cuts, but a third may be required if the floor is uneven or damaged. The first cut will be made with a coarse or medium-grained abrasive and the subsequent cut(s) with finer sandpaper. A floor polisher or disk sander will be used for the final pass to create a smooth, even finish.
The number of cuts required to refinish an older floor will be determined by its condition and the thickness of the finish to be removed. The first cuts will usually be made at a 45-degree angle with a coarse sandpaper. Once the new wood appears, using a finer grit creates a smooth and unblemished surface.

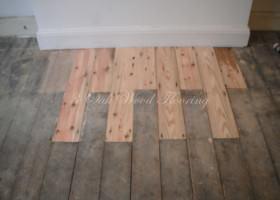
Wood floors that are laid in parallel planks are cut in the direction of the strips. If the boards are uneven, however, the first cut may be made at a 45-degree angle to remove any peaks and valleys. Minute variations in the thickness of the boards or subfloor can cause these imperfections.
Parquet, block and herringbone floors require the sander to move across the grain of the wood.
For these types of wood floors, the cuts are made diagonally, moving from one corner of the room to the other.
Each cut is made with increasingly finer sandpaper and extra care is taken to remove all scratches left by the previous pass.
After each cut, an edger is used to finish all areas that couldn’t be reached by the sanding machine. Edges, corners and areas around obstacles like radiators may need to be sanded by hand to conform with the smoothness of the rest of the floor.
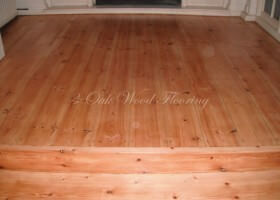
The sanding isn’t complete until we’ve carefully inspected every inch for defects, blemishes and scratches. You’ll be left with a pristine surface that looks as good as new and is ready for a finishing layer of oil, lacquer or varnish.